How to insert the jQuery carousel to your webpage
This is a step-by-step tutorial of how to insert the jQuery carousel created with Amazing Carousel to your web page.
Step 1 – Create a jQuery carousel with Amazing Carousel
Creating a jQuery carousel in Amazing Carousel is easy and straightforward. After you add images and videos to the carousel, choose a skin, you can then publish the carousel in last step.
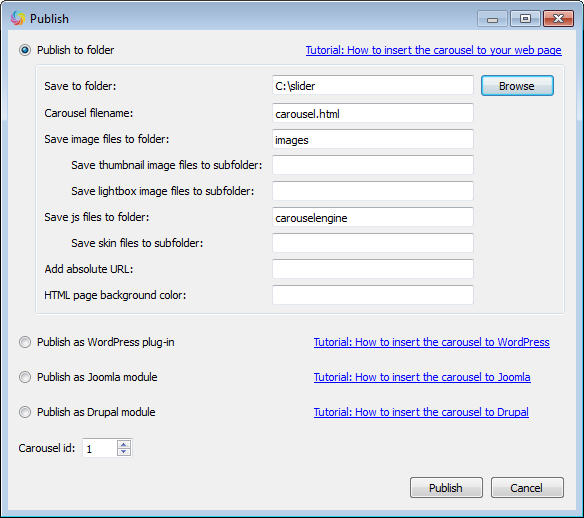
In the Publish dialog, you can choose to publish the jQuery carousel to HTML files, WordPress plugin, Joomla module or Drupal module.
To insert the jQuery carousel to a regular HTML editor, for example, Dreamweaver, Frontpage, choose the first option “Publish to folder”. This option will create HTML files and HTML codes which you can insert to your webpage.

Step 2 – Copy or upload all of the created files to the same folder as your web page
In Publish dialog, after you click the button Publish, by default, the software will create one HTML file and two folders. The folder images contains all image files of the carousel, the folder carouselengine contains the required JavaScript files, css file, skin image files.
You can open the carousel.html file with your web browser and test the carousel.
In this step, you need to copy or upload all of the file and folders to your web folder, same level as your web page.

Step 3 – Copy and Insert HTML codes to your web page
In this step, you need to copy the HTML codes to your webpage.
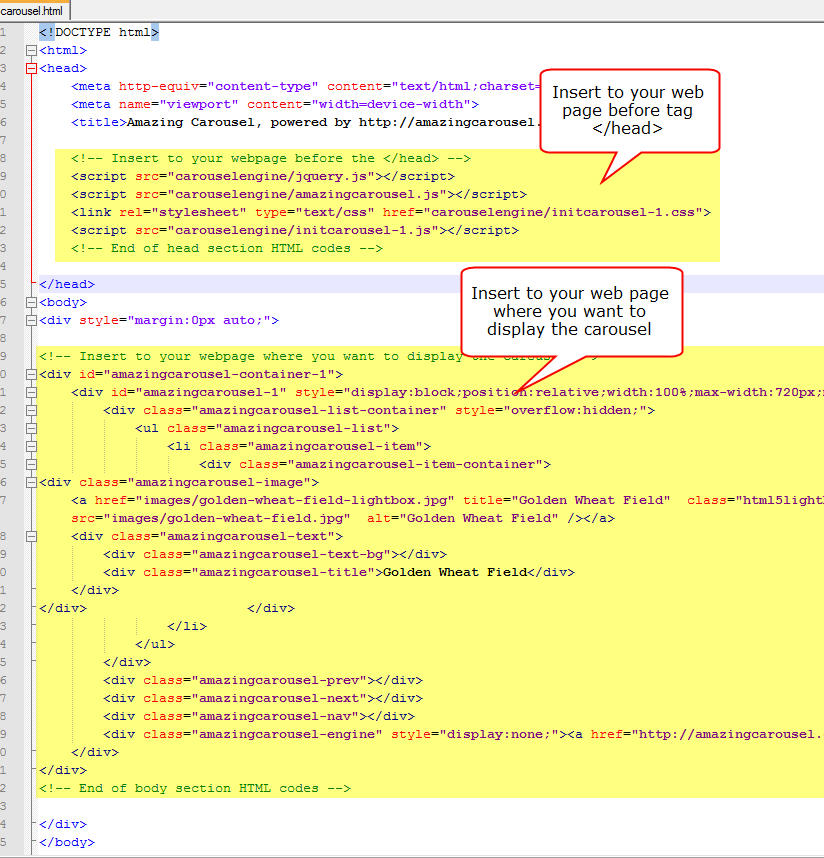
Open the created carousel.html with Notepad or any HTML or text editor. There are two code snippets in the file, you need to insert the first one to your webpage just before the tag </head> and insert the second snippet into your webpage where you want to display the slider.
When adding the first code snippet, if you already have a jquery in your webpage, you need to add the codes after your own jquery file, and remove the follow line from the snippet:
<script src="carouselengine/jquery.js"></script>
