How to customise HTML content and CSS
Amazing Carousel comes with professional pre-made templates, but you can still further customise it or create your own HTML content template, define its CSS style and create a unique HTML content slider.
Step 1 – Define HTML content with specific tags
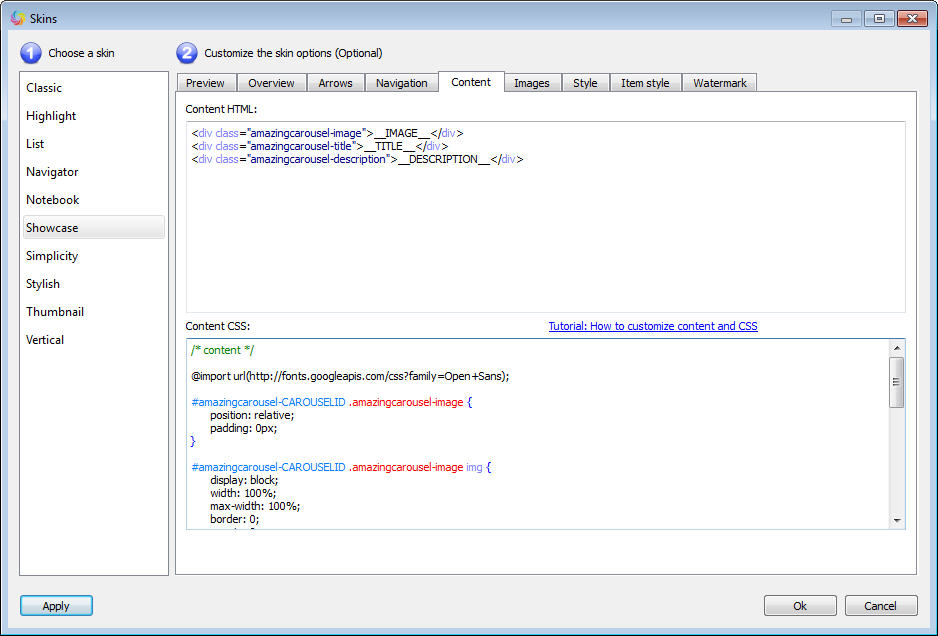
In Amazing Carousel, Skins dialog, click the tab Content. In the Content HTML text box, you can define the HTML content with our specific tags. There are five tags you can use the HTML content:
__IMAGE__: This tag will be replaced by <img />, which will contain the image file of each item. It will also contain <a />, if a link is assigned to the carousel item.
__TITLE__: This tag will be replace by the text of each item’s title.
__DESCRIPTION__: This tag will be replaced by the text of each item’s description.
__HREF__: If a link is assigned to a carousel item, this tag will be replaced by the link address. If the item is assigned a Lightbox effect, this tag will be replaced by the large image file address or the video address. If no link is assigned, this tag will be removed from resulting HTML codes.
__LIGHTBOX__: If an item is assigned a lightbox effect, this tag will be replaced by the required properties of lightbox effect. So, this tag should be placed inside a <a />, for example, <a __LIGHTBOX__ href=”https://amazingcarousel.com” />. If no lightbox effect is assigned, this tag will be removed from resulting HTML codes.
Step 2 – Define CSS of HTML content
You can define the CSS style for the content template in the Content CSS text box. The resulting CSS codes will be placed in the generated initcarousel-ID.css file which is located inside the folder carouselengine.
Suppose we have defined HTML content as:
<div class="amazingcarousel-image">__IMAGE__</div>
<div class="amazingcarousel-title">__TITLE__</div>
<div class="amazingcarousel-description">__DESCRIPTION__</div>
In the CSS codes, you need to define CSS style for the class amazingcarousel-image, amazingcarousel-title and amazingcarousel-description.
The following codes will define the class of amazingcarousel-image and img tag inside.
To support multiple carousels in one webpage, the prefix #amazingcarousel-CAROUSELID need to be added before the class name. CAROUSELID will be replaced with the value of current carousel id in the resulting CSS file.
#amazingcarousel-CAROUSELID .amazingcarousel-image {
  position: relative;
  padding: 0px;
}

#amazingcarousel-CAROUSELID .amazingcarousel-image img {
  display: block;
  width: 100%;
  max-width: 100%;
  border: 0;
  margin: 0;
  padding: 0;
  -moz-border-radius: 0px;
  -webkit-border-radius: 0px;
  border-radius: 0px;
}
The following CSS codes define the position, font, color, height of the title:
#amazingcarousel-CAROUSELID .amazingcarousel-title {
  position:relative;
  font: bold 12px 'Open Sans', sans-serif;
  color:#333333;
  margin:6px;
  text-align:left;
  line-height: 14px;
  height: 14px;
  overflow: hidden;
}
The following CSS codes define the position, font, color, height of the description:
#amazingcarousel-CAROUSELID .amazingcarousel-description {
  position:relative;
  font: 12px 'Open Sans', sans-serif;
  color:#333333;
  margin:6px;
  text-align:left;
  line-height: 14px;
  height: 28px;
  overflow: hidden;
}
Since we are using Google web font ‘Open Sans’ in the title and description CSS, we also need to import the Google font at the beginning of the CSS codes:
@import url(https://fonts.googleapis.com/css?family=Open+Sans);